How to Configure Sales Tax in CubeCart
Open your web browser and navigate to your CubeCart admin login page. Enter your username and password to log in.
Once logged in, go to the left-hand menu and click on Store Settings. From the dropdown, select Taxes.
In the Taxes section, click on the Tax Classes tab. Click the Add Class button to create a new tax class. Enter a name for the tax class (e.g., “Standard Tax”) and click Save.
Next, click on the Tax Zones tab. Click the Add Zone button to create a new tax zone. Enter a name for the tax zone (e.g., “United States”) and select the countries and regions that apply to this tax zone. Click Save.
- Top 18 Best Web Hosting Services In 2024: Despite there are multiple web hosting providers available in the market, choosing the best one is really a hard nut to crack!! Because almost all service providers are offering their services with the same features and quality.
- How to start your own Crypto currency website: For a cryptocurrency news website, choosing the right Content Management System (CMS) is crucial for managing content effectively, ensuring security, and providing a great user experience. Here are some of the best CMS options tailored for such a site, each with its unique strengths:
- The Evolution of Coffee Brewing Methods: A Historical Perspective: Coffee has been brewed and enjoyed for centuries, with various methods evolving over time to create the perfect cup of joe. From early methods like the Ibrik method and coffee pots for coffee houses to modern technologies like the AeroPress and Hario V60, the world of coffee brewing has come a long way.
- Stop WordPress from Creating Extra Cropped Image Sizes: Whenever you upload an image to your WordPress site through the media library, it automatically creates and stores multiple additional versions of that image. If your site doesn’t utilize these extra image sizes, they will consume valuable storage space and increase the size of your server backups.
- Explain WordPress Portfolio and how to created them: WordPress portfolios are digital showcases for individuals or businesses to display their work, projects, or professional accomplishments. This feature is particularly useful for creatives, freelancers, and agencies looking to exhibit their skills or services in a visually appealing and organized manner. Portfolios in WordPress can be created using various methods, including themes that come with built-in portfolio functionalities, plugins that add portfolio features, or custom coding for a more personalized approach.
- 15 Essential WordPress Plugins For Every Site: Plugins are essential for every type of website, as they provide additional features and customization options that are not available in the core WordPress platform. A study by CodeinWP found that the average WordPress site has 20 active plugins, indicating the importance of plugins in website development.
- SAILING and YACHTING: Awesome Sailing Vlogs for the Enthusiast
- Comparing Google and Microsoft’s Success in Capitalizing on Generative AI: The buzz of interest in AI services helped drive revenue for Microsoft’s biggest unit, cloud services—up by 7 percentage points compared to a year ago—and Microsoft’s overall sales rose 17 percent to nearly $62 billion. It also gained cloud market share, Nadella added. The number of $100 million cloud deals that Microsoft landed increased 80 percent during the quarter compared to the same period a year ago, and $10 million deals doubled.
- The Best WordPress Hosting Solution in Australia: Each of our WordPress hosting solutions are fine-tuned, blazing fast and are ready for you! Starting a WordPress website has never been easier with our free 1-click WordPress installation, enterprise-grade security and an assortment of tutorials and helpful guides to get you started, all backed by our 99.9% uptime guarantee.
- Elementor vs Beaver Builder: A Comparison of Design Flexibility and Performance in WordPress: Elementor and Beaver Builder are two of the most widely recognized options, each providing distinct features that cater to varying user requirements. This article conducts a comprehensive comparison of these tools, examining their design flexibility, performance metrics, and overall user experience.
- The Best Contact Form Plugins for WordPress to Easily Manage User Inquiries: In an effort to improve user interactions on WordPress websites hosting, the examination of contact form plugins becomes essential. This article aims to present an overview of the top 5 contact form plugins available for WordPress, highlighting their features and pricing structures to facilitate an well-considered choices process.
- What are the 20 best Joomla plugins: Joomla plugins are small, task-specific extensions that enhance or modify the core functionality of a Joomla website. They operate as event-driven scripts, listening for specific “events” triggered by Joomla or its components and executing corresponding actions. Plugins are a crucial part of Joomla’s extensibility, allowing developers to add features or customise behaviour without altering the core Joomla code.
- How to design a strong off-page SEO strategy: Lessons learnt from earning over 50,000 contextual links for thousands of websites in the toughest niches. In 2023, virtually every business that has a website is prioritizing their investment in SEO. The reason being, amidst the chaos of the current year, customers are resorting to online channels for safe purchasing, and optimizing their online presence is a surefire way to gain an edge over rivals. While some firms have set up internal teams, and others have hired external agencies to boost their search engine rankings, a documented off-page SEO strategy is still a rarity among most businesses.
- What are WordPress Plugins? WordPress plugins are modular pieces of software that can be added to a WordPress site to extend or enhance its functionality without modifying the core WordPress code. They allow website owners to add features, improve performance, and customise the behaviour of their websites easily, catering to a wide range of needs, from SEO and security to e-commerce and design enhancements.
Now, click on the Tax Rates tab. Click the Add Rate button to create a new tax rate. Fill in the required fields:
- Name: Enter a name for the tax rate (e.g., “State Sales Tax”).
- Class: Select the tax class you created earlier.
- Zone: Select the tax zone you created earlier.
- Rate: Enter the tax rate percentage (e.g., 7.25).
Click Save to apply the tax rate.
To ensure the correct tax rate is applied to your products, you need to assign the tax class to each product:
- Go to Inventory and select Products.
- Edit an existing product or add a new product.
- In the product details, locate the Tax Class dropdown and select the appropriate tax class.
- Click Save to apply the changes.
Perform a test checkout to ensure that the sales tax is being calculated correctly. Verify that the tax is applied based on the customer’s location and the configured tax rates.
Additional Tips
- Stay Updated: Regularly review and update your tax rates to comply with local tax laws and regulations.
- Tax Exemptions: Configure tax exemptions if applicable to certain products or customer groups.
- Professional Advice: Consult with a tax professional to ensure your tax configuration meets all legal requirements.
Also check the best osCommerce Hosting
16. How to configure sales tax in CubeCart
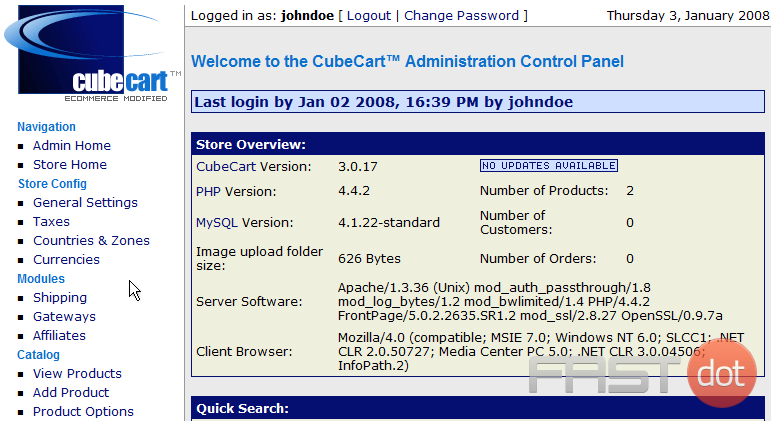
This tutorial assumes you’ve already logged in to CubeCart
Now let’s learn how to configure sales tax
1) Click Taxes
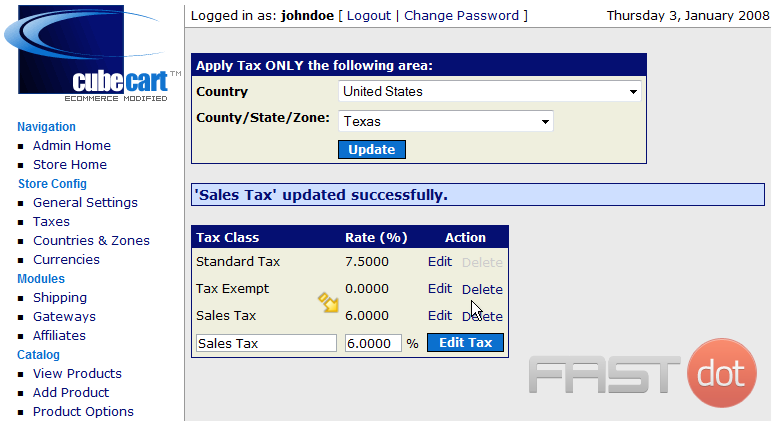
This is the Taxes page where we can configure taxes for our store. Let’s go ahead and configure our Sales Tax now
2) Enter a name for the tax here

3) Enter the Rate of the new tax here

4) Click Add Tax
That’s it! The new tax has been added and can be seen here
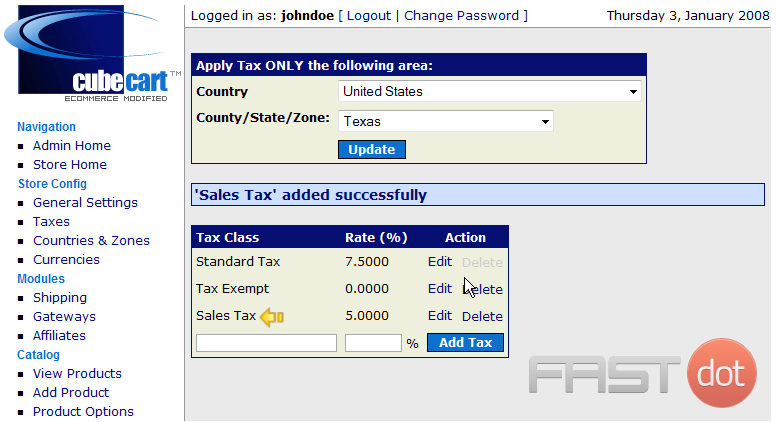
5) Click Edit
6) Enter the new rate for the Sales Tax here
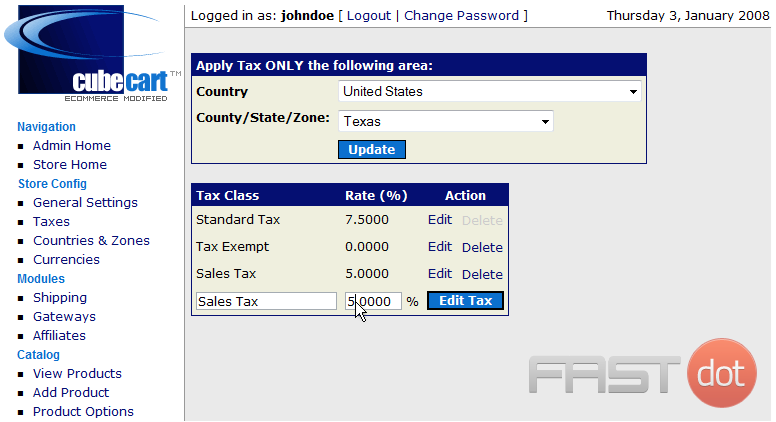
7) Click Edit Tax
As we can seen here, the rate has been changed, now let’s delete the new tax
8) Click Delete
This is the end of the tutorial. You should now know to configure sales tax in CubeCart